Last January I made a small post about setting up a “Content-Security-Policy” header for this blog. On that post I described the steps I took to reach a final result, that I thought was good enough given the “threats” this website faces.
This process usually isn’t hard If you develop the website’s software and have an high level of control over the development decisions, the end result ends up being a simple yet very strict policy. However if you do not have that degree of control over the code (and do not want to break the functionality) the policy can end up more complex and lax than you were initially hoping for. That’s what happened in my case, since I currently use a standard installation of WordPress for the blog.
The end result was a different security policy for different routes and sections (this part was not included on the blog post), that made the web-server configuration quite messy.
(With this intro, you might have already noticed that I’m just making excuses to redo the initial and working implementation, in order to test some sort of new technology)
Given the blog is behind the Cloudflare CDN and they introduced their “serverless” product called “Workers” a while ago, I decided that I could try to manage the policy dynamically on their servers.
Browser <--> CF Edge Server <--> Web Server <--> AppThe above line describes the current setup, so instead of adding the CSP header on the “App” or the “Web Server” stages, the header is now added to the response on the last stage before reaching the browser. Let me describe how I’ve done it.
Cloudflare Workers
First a very small introduction to Workers, later you can find more detailed information on Workers.dev.
So, first Cloudflare added the v8 engine to all edge servers that route the traffic of their clients, then more recently they started letting these users write small programs that can run on those servers inside the v8 sandbox.
The programs are built very similarly to how you would build a service worker (they use the same API), the main difference being where the code runs (browser vs edge server).
These “serverless” scripts can then be called directly through a specific endpoint provided by Cloudflare. In this case they should create and return a response to the requests.
Or you can instruct Cloudflare to execute them on specific routes of your website, this means that the worker can generate the response, execute any action before the request reaches your website or change the response that is returned.
This service is charged based on the number of requests handled by the “workers”.
The implementation
Going back to the original problem and based on the above description, we can dynamically introduce or modify the “Content-Security-Policy” for each request that goes through the worker which give us an high degree of flexibility.
So for my case a simple script like the one below, did the job just fine.
addEventListener('fetch', event => {
  event.respondWith(handleRequest(event.request))
})

/**
 * Forward the request and swap the response's CSP header
 * @param {Request} request
 */
async function handleRequest(request) {
  let policy = "<your-custom-policy-here>"
  let originalResponse = await fetch(request)
  response = new Response(originalResponse.body, originalResponse)
  response.headers.set('Content-Security-Policy', policy)
  return response
}
The script just listens for the request, passes it to a handler function (lines 1-3), forwards to the origin server (line 12), grabs the response (line 13), replaced the CSP header with the defined policy (line 14) and then returns the response.
If I needed something more complex, like making slight changes to the policy depending on the User-Agent to make sure different browsers behave as expected given the different implementations or compatibility issues, it would also be easy. This is something that would be harder to achieve in the config file of a regular web server (nginx, apache, etc).
Enabling the worker
Now that the script is done and the worker deployed, in order to make it run on certain requests to my blog, I just had to go to the Cloudflare’s dashboard of my domain, click on the “workers” section and add the routes I want it to be executed:
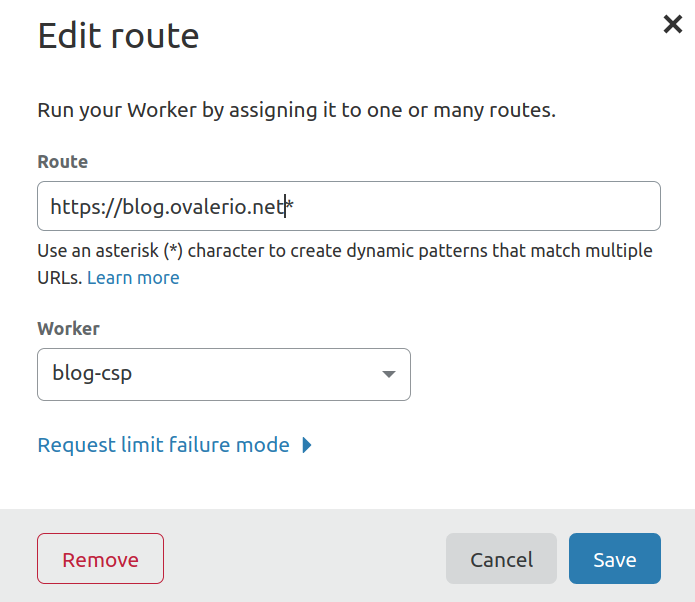
The settings displayed on the above picture will run the worker on all requests to this blog, but is can be made more specific and I can even have multiple workers for different routes.
Some sort of conclusion
Despite the use-case described in this post being very simple, there is potential in this new “serverless” offering from Cloudflare. It definitely helped me solve the problem of having different policies for different sections of the website without much trouble.
In the future I might comeback to it, to explore other user-cases or implementation details.